Wigo Stores - Documentation
Theme content is built using sections. Sections are customizable blocks of content that determine the layout and appearance of different pages on your online store. You can add, remove, edit, and customize sections using the updated theme editor.
Wigo stores have the following sections
Announcement bar
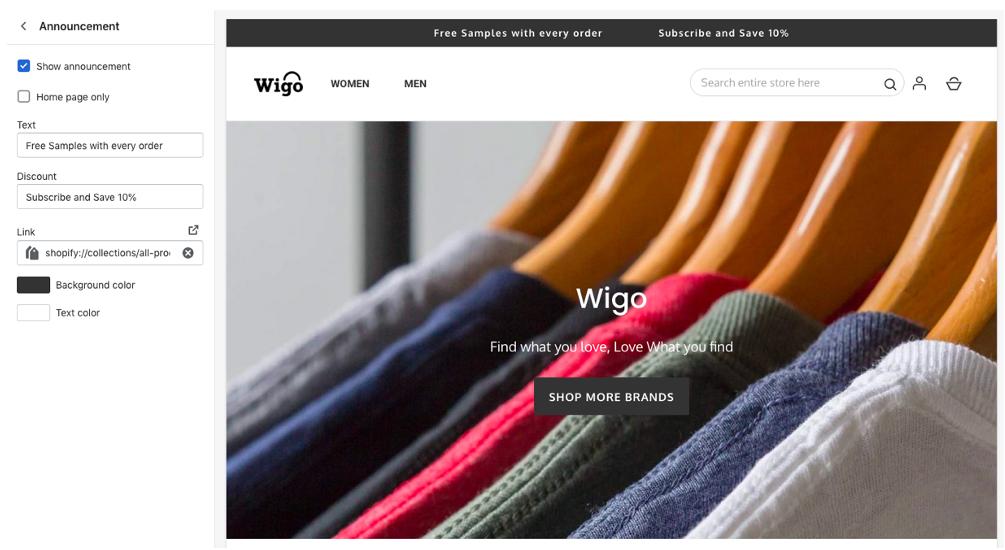
You can enable the announcement bar to show a message to your customers. Your message is completely customizable and can include contact information, a link, information about store events or sales, and your store's slogan or branding message. The announcement bar can appear on all pages of your store, but you can choose to display it on the home page only.
Enable the announcement bar
- From Shopify admin, go to Online Store > Themes.
- 2. Next to Wigo, click Customize.
- Click Header.
-
Check Show announcement.
Select Home page only to display the announcement message on the home page only.
-
Enter the text for your announcement.
-
Optional: Enter a URL to add a link to your announcement.
-
To change the color of the announcement bar background, click the Bar color swatch and choose a color.
-
To change the color of the announcement text, click the Text color swatch and choose a color.
-
Click Save.
Header
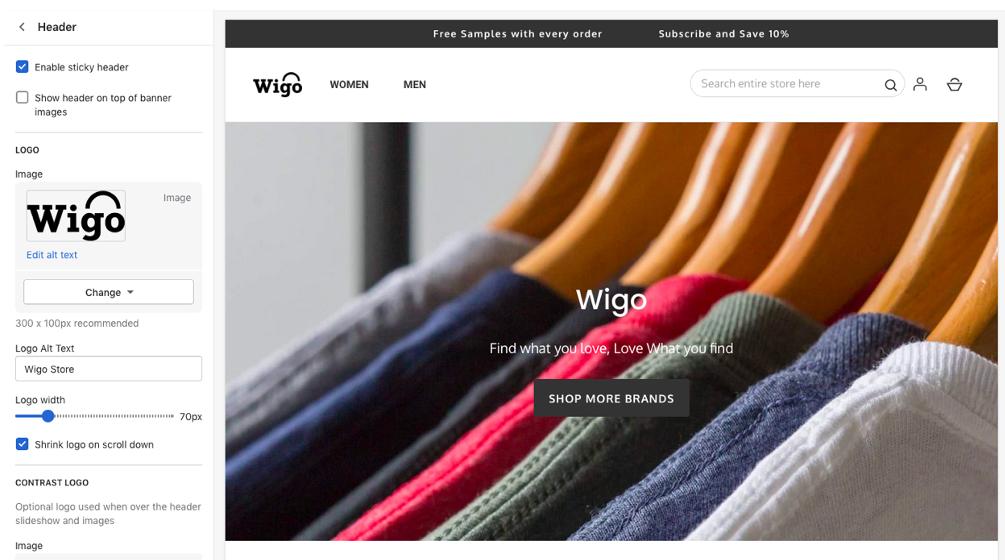
Header section includes options to edit the content that appears at top of every page. Theme has the ability to add logo image, choose which menu to show and also create an announcement message.
Add custom logo image to store's header. The best format is .png file with a transparent background and resize the logo image by increasing or decreasing the width
Add a custom logo.
- From your Shopify admin, go to Online Store > Themes.
- Next to Wigo, click Customize.
- Click Header.
-
In the Logo area, click Select image, and then do one of the following:
- To select an image that you have already uploaded to your Shopify admin, click the Library tab.
- To select an image from your local computer, click the Library tab, and then click Upload.
- Enter the logo's width in the Custom logo width (in pixels) field.
- Click Save.
Slideshow
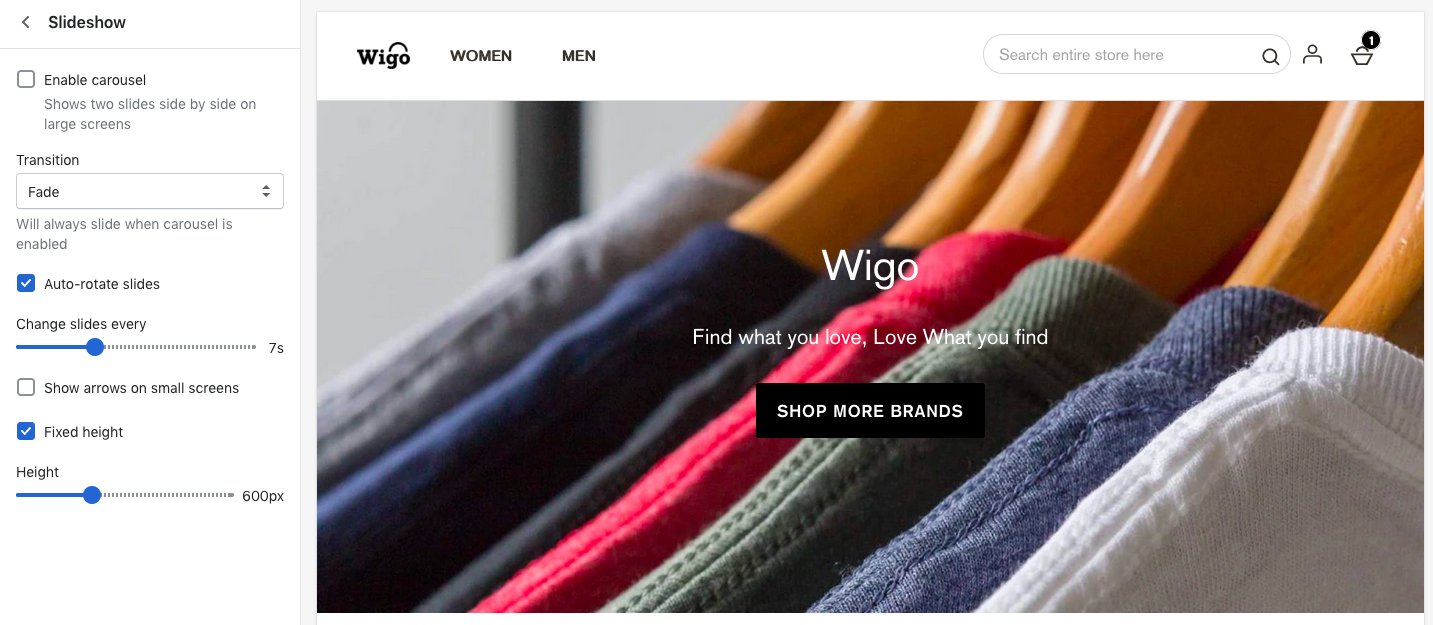
You can add a slideshow to your home page that rotates up to five images.
It's best to use high resolution images for your slides. Use images that are 3840 x 2160 px or larger, but don't exceed Shopify's upload limits.
Because the size and shape of the slideshow depends on the size and shape of the customer's device, your slideshow images will be cropped on some screens. Try to use images that have a focal point in the middle so that the important part of each image is always visible.
To learn more about the best practices for slideshow images.
The slideshow section includes the following settings:
- Slide height - Set the height of the slideshow. Select Adapt to first image slide height to base the height of your slideshow on the height of your first image.
- Auto-rotate slides - Set the slideshow to play automatically.
- Change slides every - Choose how often to change slides.
- Text and icons - Choose a color for the text and icons that appear over the slideshow.
- Image overlay - Add a layer of color over your image slide. An overlay can make slideshow text easier to read.
- Opacity - Set the opacity of your overlay.
- Image - Add an image slide to your slideshow.
- Image position - Choose the most important area of the image to focus on in the slideshow.
- Heading - Add a heading to your slide.
- Button text - Add a button with a text label to your slide.
- Button link - Set the URL or page that you want the button to link to. Paste in the URL or select a page from the menu. If you do not want to include a button in the section, then leave this field empty.
Customize your slideshow
- From your Shopify admin, go to Online Store > Themes.
- Next to Wigo, click Customize.
-
Click Slideshow.
-
Use the settings to customize your slideshow.
-
Click Save.
Footer
Theme's footer is the section that appears at the bottom of every page. Following features can be added to the footer section:
You can also display links to your social media accounts in the footer. These links are controlled by your theme settings.

Add a menu to your footer
You can add a menu, newsletter signup and text section containing information about store business to your footer. This displays all of the menu's links in your footer, which you can use to highlight the common pages that your customers want to access. For example, you could add a menu that contains links to your contact and shipping policies.
- From your Shopify admin, go to Online Store > Themes.
- Next to Wigo, click Customize.
-
Click Footer.
-
To select a menu, click Change. Select a menu from the list or click Create menu to create a new one.
-
To edit the menu, click Edit menu.
-
Click Save.
Add payment icons
You can display icons for the payment methods that you accept in your footer. This area displays the icons that are associated with the payment provider that you have enabled in the payment settings section of your admin.
- From your Shopify admin, go to Online Store > Themes.
- Next to Boundless, click Customize.
-
Click Footer.
-
Check Show payment icons.
-
Click Save.
Product
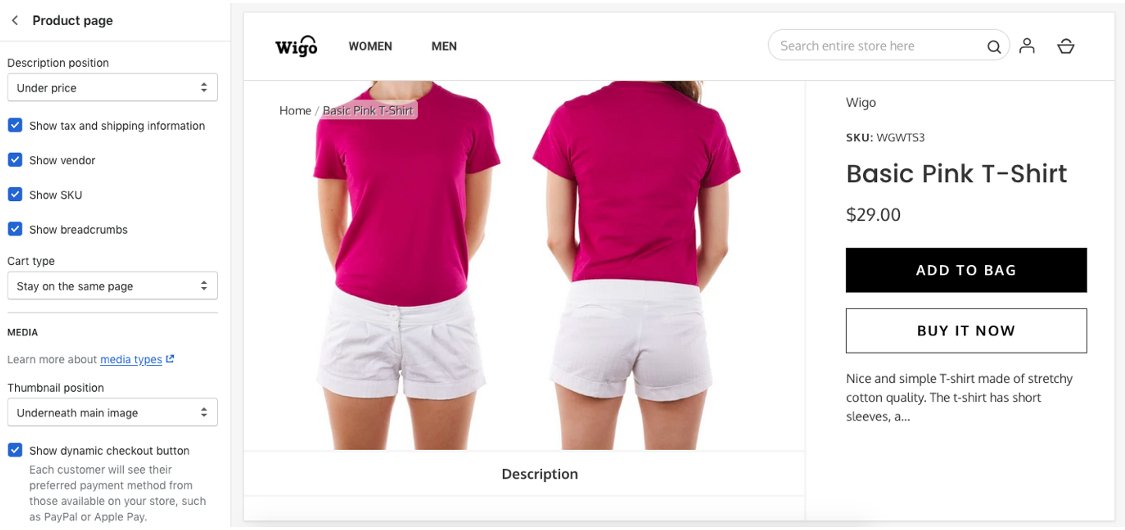
The Product section is the main customizable section for product pages. You can customize this section using the following options:
- Skip first product image - When this option is enabled, the first product image shows only on collection pages, and not on product pages. Using this option, you can design your first product image to look best on collection pages and tailor your other product images to look better in the larger space provided on product pages.
- Image style - Choose Tall/square or Wide.
- Show vendor - Show the product brand or vendor in the product page. For a brand or vendor to show, you need to add a vendor to the product.
- Show quantity selector - Let users specify a quantity to add to their cart.
- Show dynamic checkout button - Let customers skip the cart and go directly to the checkout from the featured product section.
- Product form width - Choose a Small or Large width.
You can also display product recommendations on the Product page.
Customize your product section
- From your Shopify admin, go to Online Store > Themes.
- Next to Wigo, click Customize.
- Open the drop-down menu at the top of the page.
- Select Product pages.
- Click the Product section.
- Use the settings to customize your product page.
- Click Save.
Product recommendations
You can display recommended products on product pages to make it easier for customers to discover other products that might interest them.
Enable product recommendations
- From your Shopify admin, go to Online Store > Themes.
- Next to Wigo, click Customize.
- Open the drop-down menu at the top of the page.
-
Select Product pages.
-
Click the Product recommendations section.
-
Check Show dynamic recommendations to show product recommendations on your product pages.
-
Optional: To change the title that appears above the recommended products, enter a new one in the Heading field.
-
Optional: To show or hide the vendors in the product descriptions, use the Show vendor checkbox.
-
Click Save.
Collection
The Collection section is the main customizable section for collection pages. You can customize this section using the following options:
-
Image style - Choose whether you want images to be Tall/square or Wide.
Tall/square is best if your product images are square or in portrait orientation.
Wide is best if your images are rectangular or in landscape orientation.
-
Image size - Choose an image size. If you show small product images, then you can fit more images in a single row. The number of images shown per row also depends on a customer's device and window size.
-
Add spacing between images - Increase the spacing around product images.
-
Show product vendor - Show the product brand or vendor below product images. For a brand or vendor to show, you need to add a vendor to the product.
-
Show sorting options - Select this option to let customers sort the products on your collection pages.
-
Show tag filtering - Select this option to let customers filter the collection by product tag.
-
Pagination type - Choose whether you want to show numbered pages or a View more button when there are multiple pages of products in the collection.
Customize your collection section
- From your Shopify admin, go to Online Store > Themes.
- Next to Wigo, click Customize.
- Open the drop-down menu at the top of the page.
- Select Collection pages.
- Click the Collection section.
- Use the settings to customize your collection page.
- Click Save.
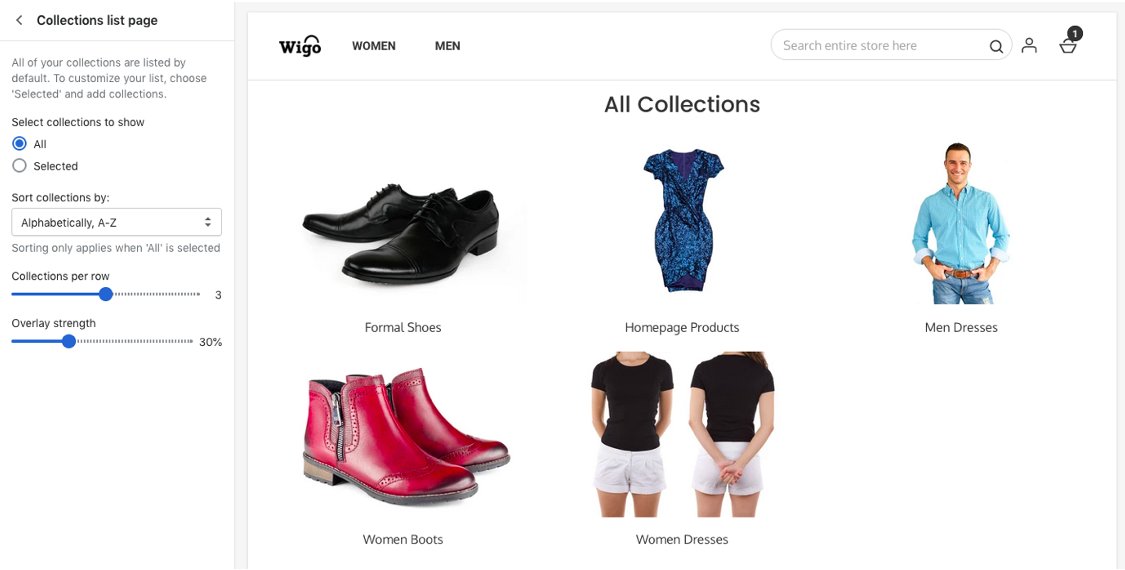
Featured collection
You can feature a collection on your home page. Featuring collections can help you promote sales and new collections.
The Featured collection section includes the following settings:
- Collection - Choose the collection that appears in the section. Up to 50 products will be displayed from the collection that you select.
-
Image style - Choose whether you want images to be Tall/square or Wide.
Tall/square is best if your product images are square or in portrait orientation.
Wide is best if your images are rectangular or in landscape orientation.
-
Image size - Choose an image size. If you show small product images, then you can fit more images in a single row. The number of images shown per row also depends on a customer's device and window size.
-
Enable image spacing - Increase the spacing around product images.
-
Show product vendor - Show the product brand or vendor below product images. For a brand or vendor to show, you need to add a vendor to the product.
Add a featured collection section to your home page
- From your Shopify admin, go to Online Store > Themes.
- Next to Wigo, click Customize.
- Click Add section.
- Click Featured collection, and then click Select.
- Click Select collection, and then select a collection from the Collection list. Up to 50 products will be displayed from the collection that you select.
- Use the settings to customize the section.
- Click Save.
Blog Pages
The Blog pages section is the main customizable section of a blogs page. The blog page lists all of the posts that are published in the blog. It can also list blog postings or display them in a grid. Both the list and grid view display the blog post title and an excerpt, if available. If no excerpt is available, the first few sentences of the blog post appear.
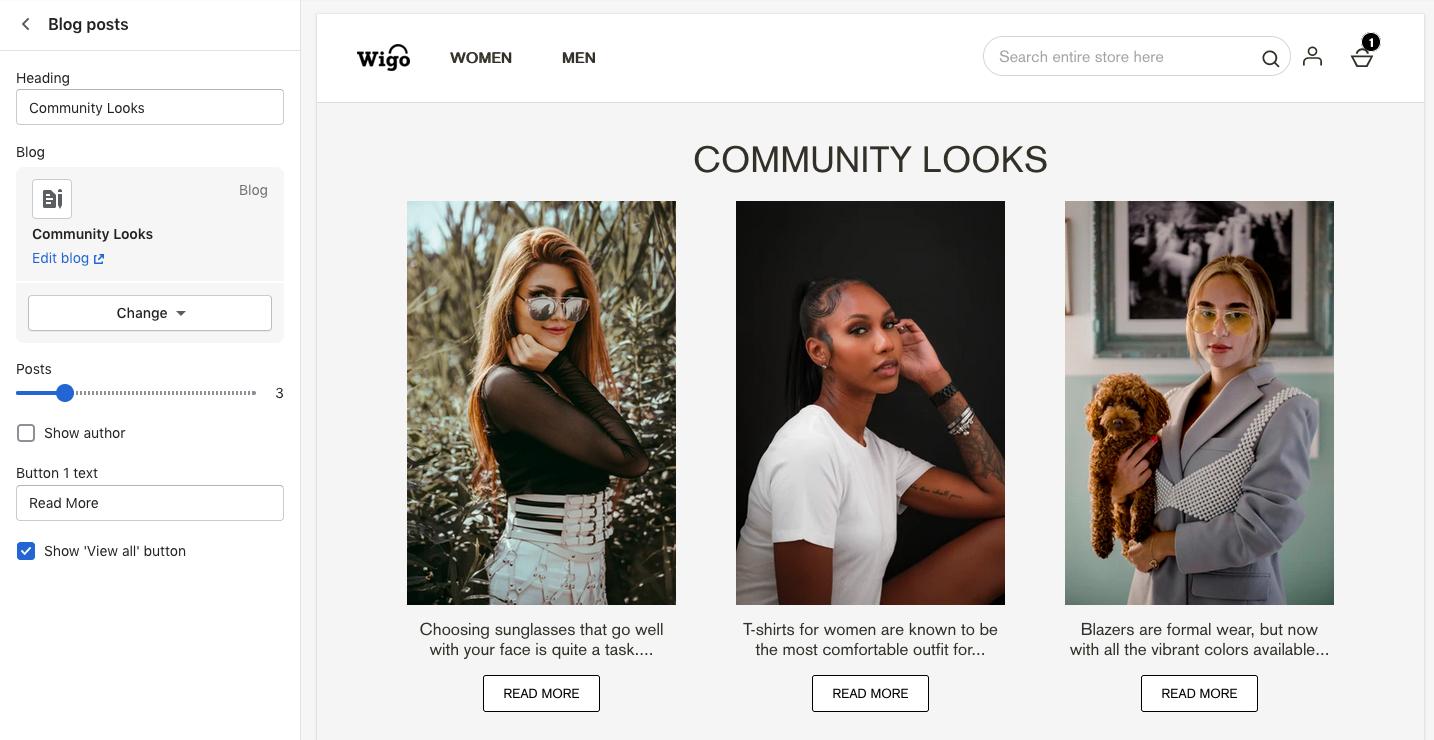
The Blog page section includes the following settings:
- Show tags – Display the tags.
- Show author - Display the author's name below the title of the blog post.
- Show date - Show the publish date below the title of the blog post.
- Header Image – Background image for the title.
- Image position – You can select the position of the uploaded image.
Add cookie consent to your home page
- From your Shopify admin, go to Online Store > Themes.
- Next to Wigo, click Customize.
-
Open the drop-down menu at the top of the page.
-
Select Blog.
Click the Blog pages section.
-
Use the settings to customize your post section.
-
Click Save.
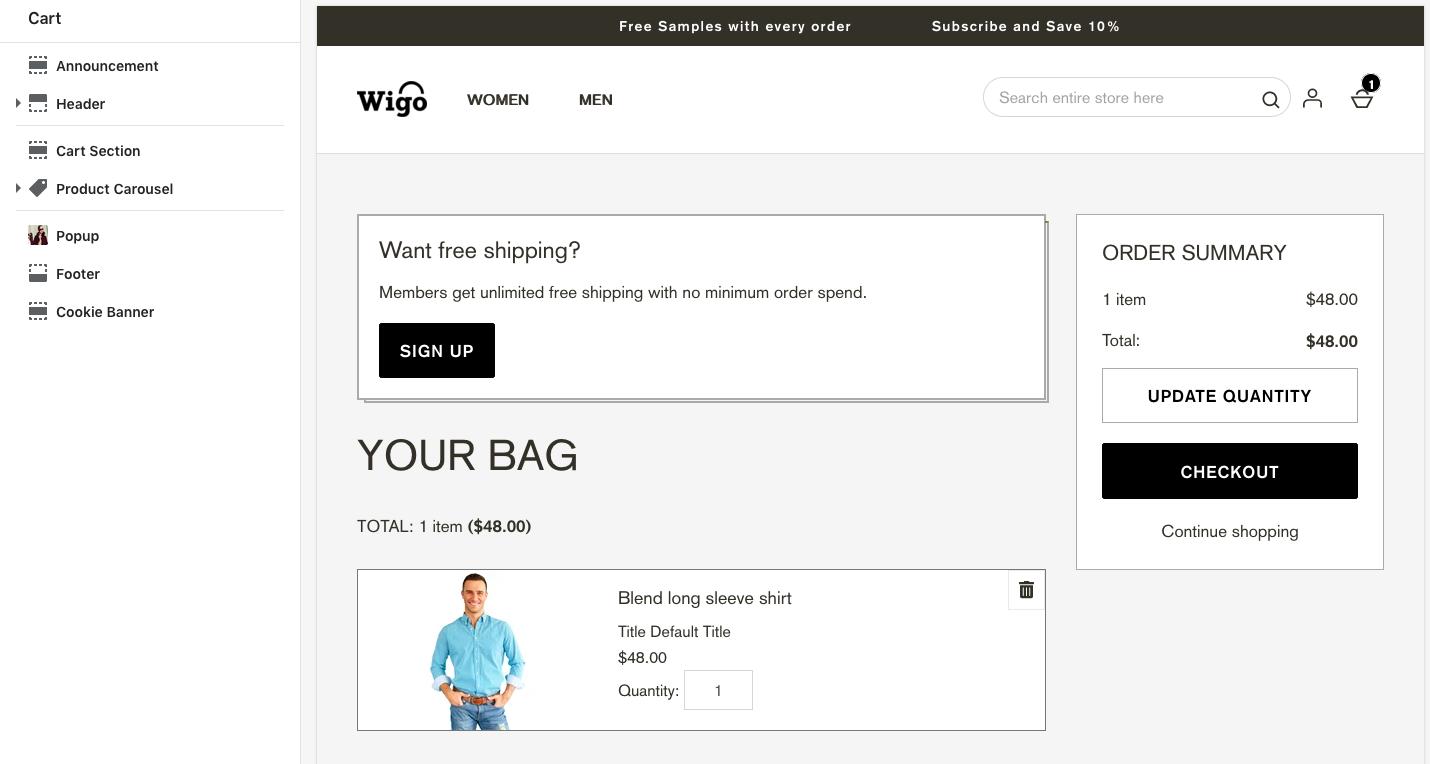
Cart Page
The Cart page section includes the following settings:
- Enable Free Shipping - Select this option to have free shipping for selected customers
- Enable also bought section – In this you can have the products you may also willing to bought this.
Customize Cart Page section:
- From your Shopify admin, go to Online Store > Themes.
- Next to Wigo, click Customize.
-
Open the drop-down menu at the top of the page.
-
Select Cart.
Click the Cart page section.
-
Use the settings to customize your Cart page section.
-
Click Save.
Newsletter Popup
You can add a newsletter signup to your home page. This lets you collect customer email addresses for email marketing campaigns. You can learn more about email marketing on the Shopify blog.
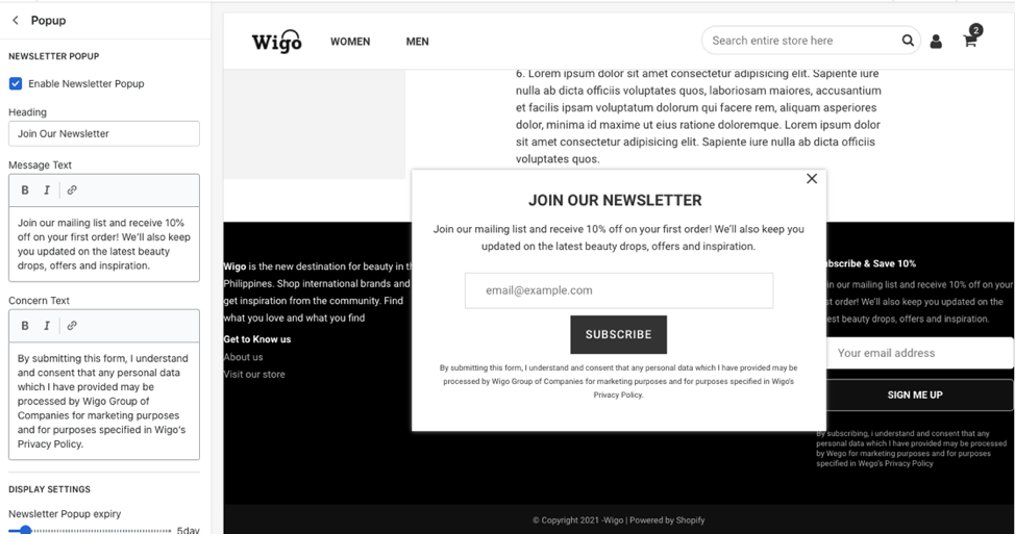
Add a newsletter signup to your home page
- From your Shopify admin, go to Online Store > Themes.
- Next to Wigo, click Customize.
-
Click Add section.
-
Click Newsletter, and then click Select.
-
Enter a heading for your newsletter signup.
-
Enter a subheading for your newsletter signup.
-
Click Save.
Cookie Consent
Theme’s cookie banner that appears at the bottom whenever a new user enters the store.
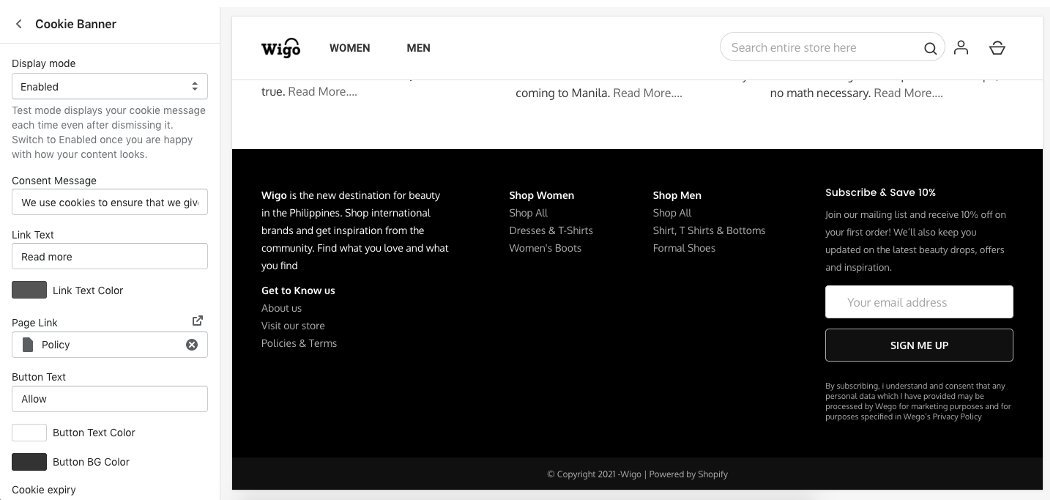
Add cookie consent to your home page
- From your Shopify admin, go to Online Store > Themes.
- Next to Wigo, click Customize.
-
Click Cookie Banner.
-
Select Display mode, and then enter consent message.
Enter Button link text and provide the URL.
-
Use the settings to customize your cookie consent message.